
Intro
Quick Navigation
Every automobile has a feature that keeps them active – the battery, which produces electric currents needed for every other part to work. Significantly, that means the battery needs to be charged to work efficiently, without the risk of damage. Even motorcycles have batteries; funnily enough, many bike owners don’t take things seriously until it starts having issues. Most of the time, it is always because the battery was kept in a poor state.
With a comprehensive guide like this, you will learn how to charge motorcycle battery. You have to read this article because the battery’s lifespan and the bike itself depend on it. Some of the things you will discover are the different types of batteries, chargers, and ways to solve potential issues when faced with them.
Questions
What are the Types of Motorcycle Batteries?
If you are passionate about riding motorcycles, investing in care and maintenance s of the essence. However, let’s look at the different types of batteries and chargers first before discussing anything else.
There are three types of bike batteries, depending on the content.
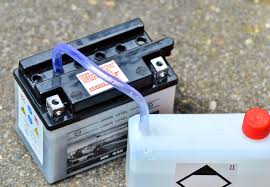
- Old Lead Acid Batteries
The Old Lead Acid Batteries for bikes contain Lead plates and Liquid acid electrolytes, which are often exposed. They are called Flooded Wet Cell Batteries due to the transparency.
- Valve Regulated Lead Acid Batteries
The other type, called the Valve Regulated Lead Acid Batteries, is also known as Sealed Dry Cell Batteries. They contain Gel electrolytes. They are often in two types because they are non-transparent – Absorbed Glass Mat Batteries or Gel Cell Batteries.
- Lithium-Ion Batteries
Lithium-Ion Batteries are often used for new generation motorcycles. They are known to be lightweight; however, they have a great working potential.
Discovering what your battery looks like from the above description goes a long way to know the charger’s choice to use.
How to Charge a Bike Battery?
Below is a step-by-step guide on how to charge the battery.
- Inspect the Battery
Before you do anything on your battery, you need to make sure it is in a good state. Unlock the motorcycle’s seat and side frame to access and inspect the battery. There are times when the battery must have been damaged; charging such a battery would only complicate things for you. If the battery is great after inspection, you could proceed to get the things needed – charger, screwdriver, etc., for the entire procedure; if not, consider getting another battery.
- Remove the Battery
Start working on the battery by detaching it from the motorcycle. Use a flat head screwdriver to remove the caps and connections. If the battery has a cover, place it somewhere safe because you will need it later. Gently remove the battery from the motorcycle and place it over a flat surface.
- Discover the Type of Charger to Use
With the battery positioned in a dry and well-ventilated area, examine and discover what type it is. For every motorcycle battery, there are chargers to use. For instance, if the battery is a Lead Acid type, conventional chargers are great; however, if it is Lithium-Ion, you may want to be careful about what you use.
Below is a description of the three types of chargers for motorcycle batteries.
- Trickle Charger
The simplest charger so far for motorbikes is the Trickle Charger. It is known ideally for converting AC to DC. It is a fully manual charger that needs constant monitoring until the process is over.
- Float Charger
Most modern motorcycles use the Float Charger because of its superior performance and automatic desulfation mode. Luckily, it has a feature that monitors the charge, so you don’t have to wait or set a timer.
- Smart Charger
The last type of bike charger, getting quite famous, is the Smart Charger. It is not so different from the Float Charger due to the presence of the automatic desulfation mode. However, the feature varies the voltage and electrical pulses excessively.
- Begin Charging Process
After choosing the best type of charger for the motorcycle battery, you can proceed with the charging process. It shouldn’t be a difficult one, as long as you are in a well-ventilated and dry area. The reason is that hazardous Hydrogen gas could be expelled in the process, which may explode if the area isn’t ventilated.
There are a few charging tips you will need, however, to
Carefully unlock the seat and side frame when gaining access to the battery, so it doesn’t get damaged.
Unscrew the cable connection with the negative terminal before the positive.
Ensure the battery charger stays on throughout the process.
Watch out for irregularities when charging.
- Test the Voltage
A motorcycle battery should take about 4 to 12 hours to charge, depending on the battery, charger, and other significant factors. When all of that is over, use a voltmeter or multimeter to test the voltage. A good 12V battery, when charged, should be between 12.3 to 12.43V.
- Return the Battery
With the battery in good condition after charging, you can now return it to the bike, as it was before you removed it. The sequence of connections is unnecessary in this case. Now, you could ride a bike with a fully powered battery.
Need to know how to charge ATV battery?.
What are the Signs of a Bad Motorcycle Battery?
In a bid to get your battery charged, you should also look for signs that it is getting worse and needs replacement. Some of the things you will notice from a bad or dead motorcycle battery are;
Zero or Cranking Ignition
No whirr of Fuel Pump
Dim Lights
Conclusion
How to charge motorcycle battery should be the least of your worries, especially after discovering the various types of batteries and chargers to use. Another important piece of information added is how to replace a battery when it starts giving bad responses. Use this information wisely, and your bike wouldn’t fail in its performance.