
Introduction
Quick Navigation
Having an ATV will do you a lot of good – it would help you get to places you never imagined. While it does so much for you, reciprocating is only ideal. One of the best ways to take care of ATVs is constantly checking every part for damages. Another way is monitoring the battery, making sure it is in good condition.
ATV, like many other road vehicles, depends on its battery for active operation. Without a good battery, it is impossible to move across different terrains and operate some accessories. Therefore, if you are an avid ATV user, knowing one or two about the battery would be perfect. You could start with learning how to charge ATV battery, as shown in this article.
Questions
[QUESTION](What the Steps Involved in Charging an ATV Battery?)
As opposed to the way you think it is, i.e., stressful, charging the battery of your ATV isn’t a herculean task; instead, you will find it easy. Usually, ATVs and UTVs have an inbuilt charging system, but it doesn’t supply enough current to the battery for performance. Therefore, you are going to be looking at getting a good charger to do the job.
Follow the step-by-step guide below on how to recharge the ATV battery when it is down.
Read on how to charge a motorcycle battery here.
- Get the ATV Parked Somewhere Safe
When it is time to get your ATV battery recharged, you shouldn’t just do it anywhere. You have to be careful about your safety. Park the ATV in a safe place – somewhere ventilated and dry. The reason for doing this is so that any gas to be expelled during the charging process could be released successfully into the environment. That would be without the risk of hazards.
For instance, overcharging an ATV battery comes with releasing a hazardous Hydrogen gas; in a ventilated environment, the gas won’t cause an igniting reaction. A garage is a great example of a dry and well-ventilated space to charge. Likewise, you should ensure the engine is turned off before you begin.
- Locate the Battery and Inspect
While you have the ATV parked at the right spot, the next thing is to locate and inspect the battery. Sometimes, the battery may have developed faults from overuse; therefore, it is only safe to check before you start charging. If it is already faulty, getting a new battery is the only way forward; if not, you are convinced that you could proceed with charging.
Some of the places you should check on a battery are the covers and bolts. It would be best if you also looked out for cracks, swells, or leaks.
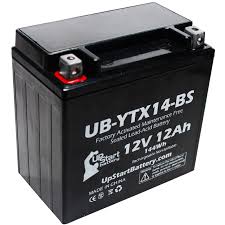
- Know Your Battery Type
Every ATV has its unique battery type that is responsible for its working operation. Generally, there are 5 types, namely;
- Flooded Lead-Acid Battery
A Flooded Lead-Acid (FLA) Battery is a wet-cell ATV battery with Lead plates and liquid acid electrolyte. It is often marked by a transparent cover to view the water level of the battery. The battery also comes with removable caps across each cell.
- Sealed Lead-Acid Battery
SLA, also called Valve-regulated Lead-Acid Battery, also has content as FLAs; however, the difference is the flat and non-transparent cover. It also comes without caps – it is sealed and should remain that way.
- Lithium-Ion Battery
The Lithium-Ion Battery is another special type for ATVs. However, the lightweight construction is a feature to tell the difference from other batteries.
- Gel-Cell Battery
With the wet-cell batteries doing their thing, there are also dry-cell batteries. The first is the Gel-Cell Battery. They are not often used in ATVs because they are quite expensive. However, they use Gel electrolytes instead of liquid acid.
- AGM Battery
The Absorbed Glass Mat (AGM) Battery is another special type of dry cell battery. It is completely sealed with Gel content; hence, you will not hear any movement within the battery.
- Get a Good ATV/UTV Charger
After discovering what type of battery your ATV uses, the next big thing is getting a top-quality charger. Several manufacturers pride themselves in making the best chargers for automotive; you should some of them out for your ATV. Most chargers specify the type of battery they charge best, so you could pick based on that. In some cases, a manual bench-style charger could be used. Every good charger usually has 12V with a low amp rate between 1-3 amps.
- Test the Battery Voltage
With a great charger right there with you, testing the battery voltage should come next. Use a voltmeter or multimeter to get accurate measurements.
- Look Out for Connections
The next part is the consequential things you need to do before the charging process commences. One of those parts is looking out for the connections – it must be clean and free. Poor connections, however, cause poor charging, i.e., overcharging and undercharging.
- Attach the Cables of the Charger
Attaching your charger cables to the battery is another thing you have to do. Connect the red cable to the positive battery terminal and the black cable to the negative terminal.
- Set Charge Current
With a proper understanding of the battery’s voltage and the charger, you could set a charge current. Your charge current should be set not more than 3amps, and 1.5amps on the min.
- Start Charging and Set Timer
Begin the charging process, and set a timer.
- Stop Charging and Disconnect
When the charging time elapses, turn off the charger. Then, disconnect the charge leads from the battery. There is no format to which you should remove first. Finally, check if the battery holds any charge; if it does, the ATV is back to begin full work.
Conclusion
If there is something you have learned in this article, it is how to charge ATV battery regardless of what battery you use. It is easy to say that the process isn’t a hard one as long as you have the right equipment and environment to do it.